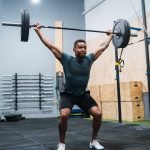
Are you looking to design the perfect gym space that stands out and works flawlessly? Revit Gym Equipment can be your secret weapon.
Imagine having access to detailed, ready-to-use models that fit right into your plans, saving you time and boosting your creativity. Whether you’re an architect, designer, or gym owner, understanding how to use Revit Gym Equipment can transform your project from ordinary to extraordinary.
Keep reading to discover how these tools can make your gym design process easier, smarter, and more efficient.
Credit: www.cgtrader.com
Choosing Gym Equipment In Revit
Choosing gym equipment in Revit requires more than just picking items off a list. It’s about understanding the space, the users, and the flow of movement. You want your digital gym model to be both functional and realistic, reflecting what actual gym layouts demand.
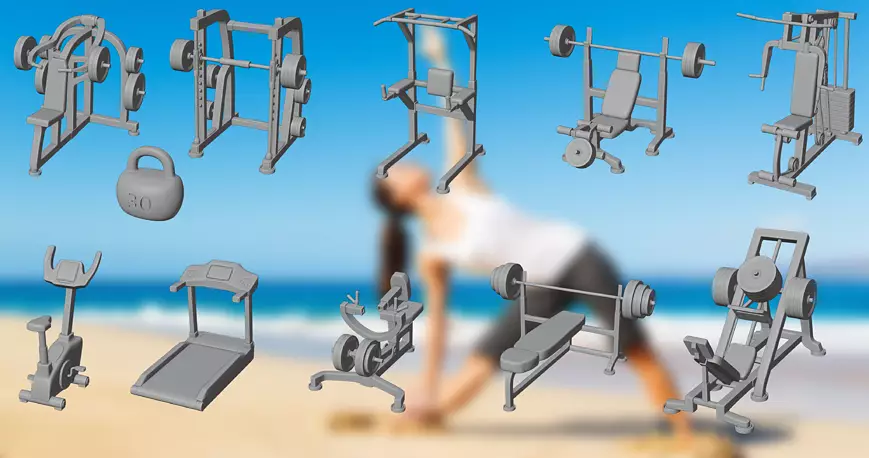
Types Of Fitness Machines
Fitness machines come in many shapes and sizes, each serving a specific purpose. In Revit, you can select from strength machines like leg presses and cable systems, or functional trainers that offer versatile workouts.
Think about who will use the gym. Will it cater to beginners or advanced athletes? This influences whether you include simpler machines or more complex setups. Also, consider space—larger machines need more room to operate safely.
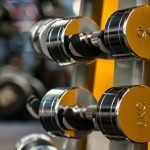
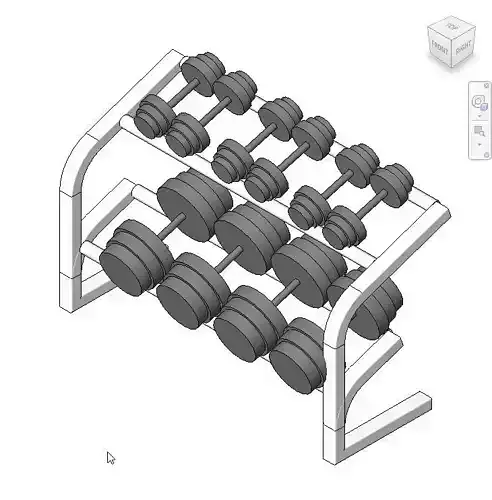
Selecting Free Weights And Accessories
Free weights add versatility and realism to your gym model. Dumbbells, kettlebells, and barbells are staples, but don’t forget racks, benches, and mats. These accessories enhance usability and give your design a professional touch.
Ask yourself how users will move between free weights and machines. Proper placement prevents clutter and improves safety. In Revit, grouping these items logically helps visualize traffic flow and usage patterns.
Incorporating Cardio Equipment
Cardio equipment like treadmills, stationary bikes, and ellipticals are essential for a balanced gym layout. Choose models that fit the scale of your space and match the gym’s target user base.
Positioning cardio machines near windows or entertainment systems can enhance user experience. Have you thought about noise levels and ventilation? These factors can influence where cardio equipment should go in your Revit design.
Credit: www.cgtrader.com
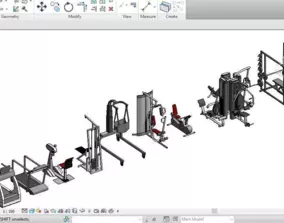
Modeling Techniques For Gym Layouts
Designing a gym in Revit involves smart modeling techniques. Efficient layouts create functional spaces. They enhance user experience and safety. Careful planning ensures a well-organized gym environment.
Creating Accurate Equipment Families
Accurate equipment families are crucial in gym modeling. Start by gathering detailed equipment specifications. Use Revit’s family editor to create precise models. Ensure dimensions match real-world sizes. This helps in visualizing true layouts. Consider manufacturer guidelines for authentic designs.
Positioning And Spacing Guidelines
Proper equipment spacing is key for safety. Maintain clear pathways between equipment. This reduces the risk of accidents. Follow standard gym spacing guidelines. Ensure users can move freely and comfortably. Adequate space improves workout flow and efficiency.
Optimizing Workflow With Revit Tools
Revit tools enhance workflow efficiency. Use alignment tools for precise equipment placement. The array tool helps in duplicating items quickly. Worksets allow collaborative modeling with ease. Leveraging these tools saves time and boosts productivity. Efficient workflows lead to successful gym designs.
Designing Functional Fitness Zones
Designing functional fitness zones in your Revit gym equipment layout is key to creating a space that motivates users and supports diverse workouts. Each zone should serve a clear purpose while flowing seamlessly into the next. Think about how people move through the gym and what equipment they’ll need close by to keep their sessions efficient and enjoyable.
Strength Training Areas
Strength zones must prioritize safety and accessibility. Arrange free weights, benches, and resistance machines so users can switch exercises without crowding. Adding sturdy flooring protects your equipment and reduces injury risk.
Consider including:
- Adjustable benches
- Racks for dumbbells and barbells
- Power racks or squat stands
Does your layout allow enough space for spotters? Clear sightlines help trainers monitor form and prevent accidents.
Cardio Zones
Cardio machines need room to breathe and easy access to water stations or towels. Group similar machines together, like treadmills or ellipticals, to help users find their preferred workout quickly.
Think about adding:
- Rowing machines
- Stationary bikes
- Stepper machines
Have you thought about how natural light or screens with entertainment can keep users engaged during longer sessions? These small touches often increase workout duration.
Stretching And Group Exercise Spaces
Open areas for stretching and group classes need flexible layouts. Use movable equipment such as mats and resistance bands that users can grab easily. This encourages a smooth transition from individual workouts to group activities.
Ensure your design includes:
- Clear floor space for stretching
- Mirrors to help users check their form
- Storage for small equipment
What kind of group activities will your gym host? Tailor this space to accommodate yoga, Pilates, or circuit training with enough room for multiple participants.
Enhancing Gym Interiors
Enhancing gym interiors goes beyond just placing equipment in a room. The way your space feels and functions impacts how motivated and comfortable you are during workouts. Thoughtful design choices can turn a simple gym into a place you want to spend time in every day.
Lighting And Ventilation Strategies
Good lighting boosts energy and focus. Natural light is ideal, but when that’s limited, bright, adjustable LED lights work well. Avoid harsh glare by using diffusers or indirect lighting to keep your eyes comfortable.
Ventilation keeps the air fresh and helps control temperature and humidity. Installing windows that open or using fans can improve airflow. Have you noticed how a stuffy gym saps your energy? Proper ventilation prevents that and makes your workout more enjoyable.
Material Choices For Durability
Gym equipment takes a beating, so the materials around it must be tough. Opt for flooring like rubber or vinyl that resists impact and is easy to clean. Walls painted with washable, moisture-resistant paint handle sweat and spills better.
Choosing metal or high-quality plastic for equipment frames ensures they last longer. Have you ever dealt with broken or worn-out machines? Selecting durable materials upfront saves you time and money on repairs down the line.
Acoustic Considerations
Noise can distract or stress you during a workout. Using sound-absorbing panels or foam can reduce echoes and loud bangs from dropping weights. Carpets or rubber mats also help muffle sounds.
Think about your gym’s location too. If it’s near living spaces, soundproofing prevents noise from bothering others. How would a quieter environment improve your focus and performance? Paying attention to acoustics makes a big difference in your gym experience.
Collaborating And Sharing Gym Designs
Collaborating and sharing gym designs in Revit is essential to streamline the entire project from concept to completion. It allows multiple team members to work together seamlessly, ensuring that every detail fits perfectly into the final layout. With clear communication and shared access, you can avoid costly errors and speed up the design process.
Using Worksharing Features
Revit’s worksharing feature lets your team work on the same gym design file simultaneously. Each member can focus on specific areas, such as equipment placement or structural details, without overwriting others’ changes.
You can create a central model stored on a shared server, while team members access local copies. This setup helps track changes, resolve conflicts, and maintain design integrity.
Have you ever struggled with version confusion in a project? Worksharing can solve that by keeping everyone on the same page in real time.
Exporting Models For Stakeholders
Sharing your gym designs with clients or contractors often requires exporting the model into accessible formats. Revit supports exporting to formats like DWG, IFC, and even 3D PDFs, making it easier for stakeholders to review without specialized software.
You can also create walkthrough animations or exploded views to help non-technical stakeholders understand the design better. These visuals improve communication and reduce misunderstandings.
Think about how often you’ve sent drawings back and forth with unclear feedback. Providing clear exports can minimize that back-and-forth and keep the project moving.
Integrating Feedback Into Designs
Receiving feedback is a critical part of refining your gym design. Using Revit, you can easily update the model based on comments from clients, trainers, or contractors.
Track changes carefully by using revision clouds and notes within the model to highlight updates. This way, everyone stays informed about what was modified and why.
Have you noticed how incorporating diverse viewpoints can lead to better, more functional gym spaces? Making feedback a regular part of your workflow helps you create designs that truly meet user needs.
Tips For Efficient Gym Projects
Efficient gym projects in Revit require more than just technical know-how; they demand smart strategies to speed up your workflow and maintain high-quality designs. By focusing on practical tips, you can avoid common pitfalls and deliver consistent results that impress clients and users alike.
Time-saving Revit Shortcuts
Mastering keyboard shortcuts can dramatically cut down your project time. For instance, using “WA”to quickly create walls or “CS”for copying elements along a specific axis keeps your focus sharp and hands on the keyboard.
Don’t overlook the power of custom shortcuts. Assigning your most-used commands to keys you can reach easily saves seconds that add up over a whole project.
Have you tried the “Tab” keyto cycle through overlapping elements? It’s a simple trick that avoids frustration when selecting gym equipment stacked in tight spaces.
Common Design Challenges
Designing gym spaces often means juggling complex equipment layouts with strict safety codes. You might find it tricky to balance enough space for movement without overcrowding.
One frequent issue is ensuring proper clearance around machines. Not leaving enough room can lead to costly revisions later.
Another challenge is integrating HVAC and electrical systems without compromising gym aesthetics. Collaborate early with MEP teams to avoid clashes and rework.
Maintaining Design Consistency
Consistency in gym design builds a professional look and streamlines your Revit process. Use shared families for equipment to keep dimensions and details uniform across the project.
Set up templates with predefined views, sheets, and annotation styles. This approach reduces repetitive setup and helps maintain a unified appearance.
Have you created a checklist to review your model regularly? Checking alignment, naming conventions, and parameter consistency at each phase can prevent errors before they grow.
Credit: www.cgtrader.com
Frequently Asked Questions
What Is Revit Gym Equipment Used For?
Revit Gym Equipment is used for creating detailed 3D models of gym spaces. It helps architects and designers plan layouts accurately. This tool ensures efficient equipment placement and space optimization in fitness centers. It improves project visualization and communication with clients.
How To Import Gym Equipment In Revit?
To import gym equipment in Revit, use the “Insert” tab. Select “Load Family,” then choose the gym equipment file. It supports formats like. rfa or. rvt. This process adds realistic gym equipment models to your project quickly.
Are Revit Gym Equipment Families Customizable?
Yes, Revit gym equipment families are customizable. You can adjust dimensions, materials, and colors. This flexibility helps tailor equipment to fit specific design needs. Customization improves project accuracy and client satisfaction.
Can Revit Gym Equipment Improve Project Efficiency?
Revit gym equipment improves project efficiency by saving design time. It provides ready-made models that reduce manual drafting. This speeds up gym layout planning and reduces errors. Efficient workflows lead to faster project completion.
Conclusion
Revit gym equipment offers many benefits for designers and builders. It helps create accurate, detailed 3D models quickly. This saves time and reduces mistakes during construction. Users can easily adjust designs to fit different spaces or needs. Collaboration between teams also improves with clear, shared plans.
Choosing Revit tools supports efficient and organized project workflows. Try incorporating these tools for better gym design results. Simple steps lead to stronger, safer fitness spaces.